


INTERIOR PHOTOGRAPHY TIPS & TRICKS
 |
The majority of our photography at LES is taken by Lauren, our Founder (and namesake if you're new here). With no formal training, Lauren has taught herself the ins and outs of camera work on her own - with the occasional YouTube tutorial on standby of course. When her focus is better utitlized styling a shot, we'll bring in backup behind the lens - Natalie Black and Max Burkhalter are Brooklyn-based photographers we've loved collaborating with over the past year. With the holidays nearly here, we wanted to take a moment to focus (pun intended) on interior photography as we all gear up for some memorable moments inside with our loved ones - or at least for the gorgeous tablescape you'll want to remember. Interior photography can present challenges, and Lauren has learned the most from trial and error, in addition to the on-set advice she's picked up from our sometime-resident pros. Read on for some great tips, and don't be afraid to experiment on your own! Sometimes learning by doing is the best way to go.
|
Photography by Max Burkhalter |
Photography by Natalie Black |


On Equipment:
Max: Tripod, tripod, tripod...seems rudimentary and obvious, but a quality tripod and good head (I used the Manfrotto 410 Junior geared head) is absolutely crucial for what I do. Know it, learn it, love it. This is my single most used piece of gear. Don't go cheap. Get a good quality, lightweight tripod. A remote trigger or your camera's self timer. A lot of my exposures are longer and it's good to be able to not touch the camera while shooting, particularly if you shoot different exposures that will be combined later. I will even throw a small sandbag around my tripod to ensure the camera doesn't move.
Lauren: My camera is a Sony a7 IV Digital Camera and I'm very happy with it. At a certain point I'll need to upgrade, but so far this one has served me well for our LES imagery.
|
|
 Photography by Max Burkhalter
On Lighting:
Natalie: Natural light is the best tool at your disposal. Look for natural light streaming through windows and shoot with the light coming from either the right or left side of your camera. Whether it is harsh lighting or diffused by clouds, natural lighting will help frame the composition of the shot and add dimension.
Max: Light is crucial. I think when I was starting out I was always looking for ways to add more light, but overtime I have learned it's just effective and sometimes better to remove light. This can be done with black velveteen, black side reflectors, or even black trash bags. Put them over windows (out of frame) and it will give you more control over the light. These are also effective with glare on framed art if a lens polarizer isn't enough. Hold it close to the frame in a way that covers the entire art (but don't block the art in front of the camera) and you can drop this in later over another image with Photoshop for a glare free piece. Just make sure you expose for the art itself and not the scene, or it will look off in your final image.
Lauren: I only shoot in natural light. That's probably one of my biggest tips - no artificial lighting! I also love using glass doors or other reflective props to create additional lighting in-frame. Sometimes this isn't straight forward and you have to play around a bit. That's the fun part though - learning new tricks as your practice evolves.
|
Volume II Cover by Max Burkhalter |
"TAKE THE SAME PHOTO AT SEVERAL DIFFERENT DISTANCES SO YOU CAN DETERMINE WHICH YOU LIKE BEST LATER. EVEN PROFESSIONALS HAVE A HARD TIME KNOWING WHEN THEY GOT THE SHOT UNTIL LOOKING THROUGH A LARGE SELECTION OF PHOTOS AFTER" - Natalie Black
|

Composition:
Natalie: When you're just starting out, focus on mastering taking photos of vignettes using a tighter frame before moving on to wider angles of your space. Vignettes are a curated scene of placed objects or composition that set the tone for the wider photo. It can be overwhelming to focus on how your shot looks when there is too much within the frame. Perfecting the composition of a tighter shot will make it easier to zoom out and emulate the composition for the whole room.
|
Photography by Natalie Black |

Take the same photo at several different distances so you can determine which you like best later. Even professionals have a hard time knowing when they got the shot until looking through a large selection of photos after. Differing distances provide varying levels of space in your photos which may improve the overall composition of the shot.
 Photography by Lauren Sands
|
 Photography by Natalie Black
|
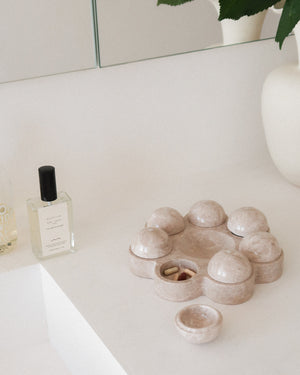
Interior Photography Props:
Lauren: When shooting a vignette, make sure you have height, varying shapes, and potential for interesting shadows. Tall vases, funky candlesticks, and books that can be used as platforms are some of my favorites.
Also - check out Volume II to see more of Max and Natalie's work!
|
Full Moon Vase by Talia Warshawsky |
Tulip Bud Candlestick Holder by Doris Josovitz |


|
Jean Michel Frank Assouline |
Antique Vessel Vintage |


|
Isolated n. 24 by Canoa Lab |
Esme Vase in Lava by Kalya O'Donoghue |


|
Box Tray in Travertine by Anastasio Home |
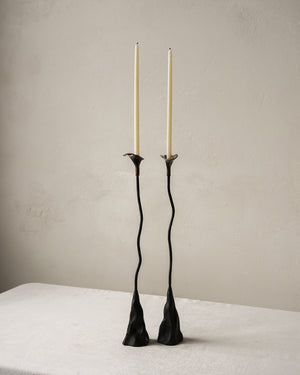
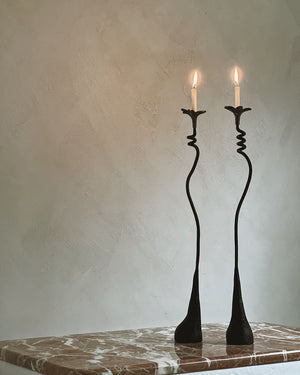
Callas Iron Series |


|
|